skip to main |
skip to sidebar
 I finally did an printing experiment that I've been wanting to do using foam trays. You know those kind that meat and fruit are packed on? Friends and neighbors have been saving them for me, and I finally can offer this project with the kids in my studio.
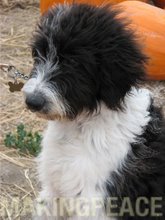
  The following are a few simple steps to use your foam trays and make repeated images. Step one, using an exacto blade I cut out a flat piece from the tray to carve on. Step two, I then used a light pencil line to layout my design, then pressed much harder with the pencil, creating a deep ravine that would convey my image. Step three, using my Brayer and Block Printing Ink, laid out the red paint on a flat surface covered with freezer paper, then transferred the paint as evenly as possible onto my foam "block". Step four, lay the foam "block" onto good paper, cover it with a hard-backed book, and you can see my lovely (and petulant) assistant in action, applying even pressure to make a good solid transfer. I'll post the kids work with foam prints in the studio this week on Alameda StudioTime.


 I finally did an printing experiment that I've been wanting to do using foam trays. You know those kind that meat and fruit are packed on? Friends and neighbors have been saving them for me, and I finally can offer this project with the kids in my studio.
  The following are a few simple steps to use your foam trays and make repeated images. Step one, using an exacto blade I cut out a flat piece from the tray to carve on. Step two, I then used a light pencil line to layout my design, then pressed much harder with the pencil, creating a deep ravine that would convey my image. Step three, using my Brayer and Block Printing Ink, laid out the red paint on a flat surface covered with freezer paper, then transferred the paint as evenly as possible onto my foam "block". Step four, lay the foam "block" onto good paper, cover it with a hard-backed book, and you can see my lovely (and petulant) assistant in action, applying even pressure to make a good solid transfer. I'll post the kids work with foam prints in the studio this week on Alameda StudioTime.


3 comments:
I like the gratuitous photo of the pretty girl. I find the foam printing very interesting and children will love it, I am sure
This turned out just great and with a little help from an assistant! I will be back to see the students work!
I realized that I didn't comment on the model's hair. That length is really a good length for her face and size! I like it.
Post a Comment